House Wallpaper
November 9, 2019
Don’t Be Afraid of Bold Patterns
November 9, 2019Modern wall paper For A Modern Room

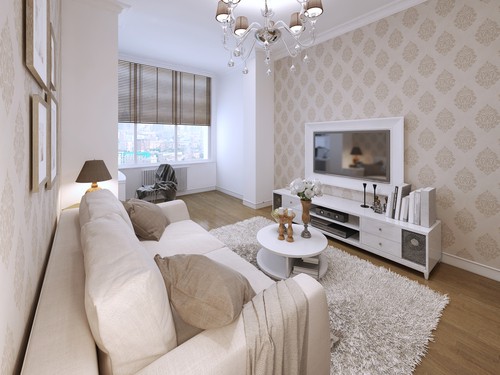
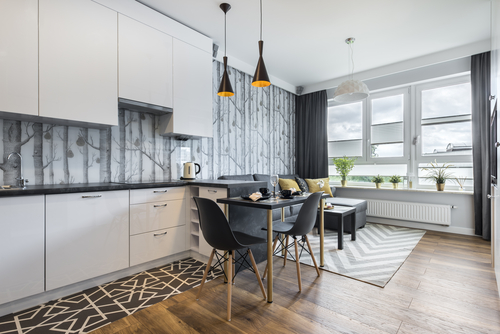
The wall paper is one of an ideal home additions that you can have for any of your rooms. According to the positive articles on wall paper, these home additions are versatile sufficient to withstand most of the demanding environmental conditions. Below are some of the concepts regarding wall papers. To start with, if the wall behind the wall paper has already been primed or painted it will make the wall paper much less complicated to remove, but if there is unpainted drywall under the wall paper, which is when the job will become harder. The reason is that if you remove wall paper from unpainted drywall, it can damage the wall by tearing the paper backing off of the drywall. If this happens, you must repair the wall using joint compound. Once you have removed a section of wall paper, check and see if the wall has been primed or painted. If not, you will need to be very careful not to cause any unnecessary damage to the drywall.
Advantages of using wall paper over other decor choices:
1. Having a beautiful wall for a lovely room is a good idea. Using the wall papers to help you enhance these walls further is an even better idea to keep your room fashionable.
2.The wall paper can help in enhancing the entire look of the room.
3. If you want to change your mind regarding the wall designs, you need to exert relatively less effort in performing the necessary alterations.
4. The wall paper can help protect the outer portions of the base wall from some environmental factors such as dust and insects.
5. This can help you make the most out of the funds that you currently have.
6. wall papers are relatively affordable so you can buy as much as your budget permits you to.
According to the positive articles on wall paper, possibility of changing wall design can keep your room’s trendy and fasion, whatever the season may be.
Types:
There are various types of wall papers that you may want to purchase for your rooms. The wall papers are typically classified according to the main materials used to manufacture them.
1.Coated fabric wall paper
May be considered as one of the most expensive types of wall papers that you can purchase in the market today. However, the level of durability that you can obtain from these wall papers is high. This, in effect, makes up for the slight increase in price that the people have to pay for a square inch of this material.
2. Vinyl coated wall paper
Is coated with around three types of chemicals to help protect the surface of the wall papers. These chemicals include vinyl; acrylic; and polyvinyl chloride. Compared to the rest of the wall paper types, this wall paper is the easiest to clean. All you have to do is to use a damp cloth to wipe off the grease, dirt, and grime from these wall papers.
3. Paper backed vinyl wall paper
Is a wall paper classification that uses pulp and paper as the outer surfaces of the base material. This is highly suitable for the room with high levels of humidity. According to experts, this wall paper is appropriate for any location.
4. Solid sheet vinyl wall paper
Is a type that is highly similar to the paper backed vinyl wall paper. This classification is easy to clean. In fact, this can withstand heavy duty cleaning, including soft scrubbing with a sponge. Another advantage of this wall paper is its ability to remain intact after removal from the wall.
These are some of the things that you may derive from the definite articles on the wall paper. If you want to learn more about this nice home addition, you may consult various resources to help you learn and understand more about them. In the long run, this can help beautify your room without spending more.
How apply Embossed wall paper on your ceiling.
Embossed wall papers look great and give your home the much-needed makeover. Being available in a variety of chic designs, embossed wall paper isn’t only good for walls but can transform the ceiling of your house as well. Giving the ceiling of your home an embossed wall paper treatment is easy too. Simply follow the steps below to make sure your new ceiling speaks for itself.
1) Preparing the surface for wall papering:
The first step is to remove any previous wall paper that you might have applied to the ceiling. Once the surface is free from old paper, sand the surface using sandpaper and clean it with a commercially available cleaner. Once the surface is clean and dry, make sure to remove any loose paint from the surface of the ceiling, so that once the wall paper is applied, it doesn’t fall back. Now apply acrylic primer, which is made to go with the clay based-adhesive used to apply wall paper, onto the ceiling. Leave the ceiling to dry for at least a complete day.
2) Mark the ceiling:
Embossed wall papers come in standard width size of 20.5″. To make sure that you don’t run short of wall paper or there are no overlapping wall papers, mark a line measuring 20 from edge of ceiling. Pound nail on the 20″ mark and run a chalk line across length ceiling. This marking will help you easily apply the wall paper in a straight line.
3) Preparing the wall paper:
Rolling out the length of the wall paper, while ensuring that you don’t push, bend or pull the wall paper out hard, as any hard presses on the wall paper will destroy its embossed designs. Once the wall paper is rolled out, use a special wall paper brush to apply adhesive back side of the wall paper. Leave the wall paper aside for at least 10 minutes for the adhesive to set.
4) Applying the wall paper:
Once the adhesive on the wall paper is set, place it lightly on the ceiling, while bringing out the paper sheet an extra-inch against ceiling molding. The next step is to simply place it along chalk-line you made in Step 2. Lightly press the wall paper in place, without destroying its design. Once a foot length of the wall paper has been applied, just brush the wall paper along its entire length with a wall paper smoothing brush. Once the first sheet is applied, apply the next strips, while adding about three inches of wall paper on each end to make sure that the pattern on the wall paper matches, without any overlapping. Once the wall paper is covering your entire ceiling, use a razor knife along with a trim guard to remove all excess wall paper. Since the adhesive discolors the wall paper, you can paint your ceiling in any new color after letting the wall paper and the adhesive set on the ceiling for one complete day.


